This is a Butcher Block segment from Love of the Hunt TV. In this segment, Brad shows you how to make your own Jalapeno Cheese Bear Kielbasa. Brad uses:

Wednesday, October 29, 2014
Love of the Hunt TV: Jalapeno & Cheese Bear Kielbasa
This is a Butcher Block segment from Love of the Hunt TV. In this segment, Brad shows you how to make your own Jalapeno Cheese Bear Kielbasa. Brad uses:
Wednesday, October 22, 2014
How to Use a Bradley Smoker Indoors

Dion from Manitoba, CA asked:
I noticed on a recent show you had a Bradley smoker going indoors - how did you pipe it outside? I do a lot of home processing but working around the Canadian north's weather is a challenge. I have plenty of room in my shop/garage, just need some advice or ideas for venting!
Thanks,
Dion
Thanks for the question Dion,
I simply put a triple wall pipe up though the ceiling, just like pluming in a wood burner. The only downfall is: on damp days it has a little trouble drafting. So I warm the pipe up by turning the smoker on to 160F for 30 minutes before I turn on the smoke generator.
If you don't, you'll have a building full of smoke. On of top my Bradley Smoker, I have a piece of flex pipe screwed directly to the top of the smoker over top of the dampener.
Good luck and happy all year smoking!!!
Brad
Good luck and happy all year smoking!!!
Brad
Wednesday, October 15, 2014
Wild Game Butchering Classes?

I would very much like to hang out/learn from some "pros" how to properly butcher deer (maybe other game). Are you aware of any schools/courses (hands-on) that are available?
Hello Terrance!
I can honestly tell you that there's so much useless knowledge about meat processing stuffed up inside my head, you would go crazy listening to it all. I'm just kidding ya!
With that being said, the next best thing would be the instructional DVD series that I produce. The Game Processing library has 4 discs in it, plus a 2 hour bonus hunting DVD! 9 hours of knowledge that is step by step, in detail with extreme close up video to match it all up. Each DVD has chapter menus, so you can watch each section as many times as you would like. I have a saying that goes like this: After you watch these DVDs, if you can't process game like a pro - take up knitting!
All joking aside, the closest thing to the DVDs are the 2-hour short courses I do at various events like the NRA National Show and other local events. The DVDs are a great resource that you can watch over and over again. More knowledge than I can share in any email or blog post.
All joking aside, the closest thing to the DVDs are the 2-hour short courses I do at various events like the NRA National Show and other local events. The DVDs are a great resource that you can watch over and over again. More knowledge than I can share in any email or blog post.
Good luck this season!
- Brad Lockwood, Love of the Hunt TV
- Brad Lockwood, Love of the Hunt TV
Wednesday, October 8, 2014
Proper Hanging Time for Wild Game Quarters

Hi Brad,
I purchased the complete set of your DVDs. I understand what you are saying about the 3 day per 100 pounds.
My question then is: If you harvest a 400 lb moose. You quarter it. Then you are hanging roughly 100 pound quarters.
Is the proper hanging time 12 days or 3 days for each quarter?
Warren that's a very good question and I thank you!
Yes, you will age 12 days for a 400lb moose. The only issue you're going to run into with the quarters is going to be waste. When you quarter the animal, which I realize is the only way to get one out of the field, you create a lot of exposed surface area. That surface area is going to dry out and get dark. But after you trim it off, the meat under will be tender as velvet!
Thanks for the great question and enjoy the moose meat, it's my favorite!
-Brad
Wednesday, October 1, 2014
Custom Sausage Making

I am wanting to make a combo sausage using deer and rabbit. My question for you is: What fat trimmings should I use and how what is the lbs to lbs ratio. I'm big fan of the blog! Watch you from Youtube!
Thanks for the question Jackie!
That's a very interesting product! I'd love to try that someday.
The rule that I apply concerning what type of fat to use is based upon what product I'm trying to duplicate. For example, if I'm making a summer sausage which is traditionally a beef product I will mix beef trim or beef fat in with my game meat. If I'm making Kielbasa or Bratwurst which is typically a pork based product, I will add pork back fat or pork butt trimmings.
It sounds like you're making a basic sausage product, which would traditionally be a pork based product, so I would use pork back fat or pork butt trimmings.
A desirable fat to lean ratio is typically 80/20. If you trim your game meat lean, which you should, and dispose of all that off-flavored wild game fat, you will have a very lean product. That's why we love game meat so much, right?! It's lean and healthy!
After the fat is trimmed, you should have a 95-98% lean product, so if you want an 80/20 (80% lean and 20% fat) blend then you would need to add 1.5 lbs of pure back fat with 8.5lbs of good lean trim for a 10 lb batch.
Be careful using pure back fat. If you add a little too much it can be a lot! If you don't add enough, you'll never notice that it's even in the product. Pure fat can be a little tricky. It's generally not expensive to get, but it can be touchy when adding enough or not enough.
Now, when using pork butt trimmings, you will also have some lean pork in there, so the window of too much or not enough increases. You can use 3 lbs of pork butt trimmings and 7 lbs of game meat for each 10 lb batch. You have a much larger window of error. Next, mix your seasonings and a little water to blend the seasonings - and you're ready to grind!!
Good luck and thanks for the great question!
Brad Lockwood
Wednesday, September 24, 2014
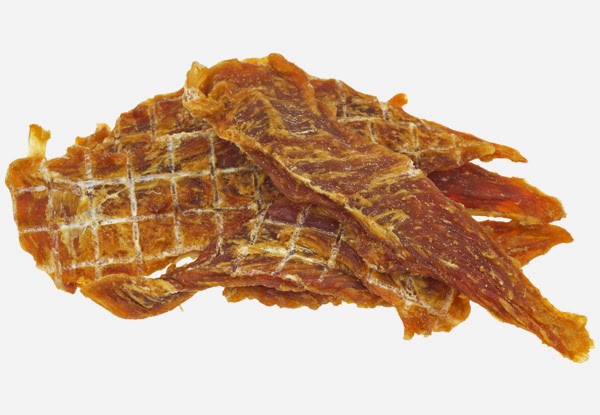
Thickness and Timing for Perfect Jerky
 |
| This is a thicker, 1/4" sliced jerky |
Paul Eckert of Jasper, IN wrote in:
Brad,
I am a disabled vet that spends alot of my time hunting and fishing. I love to make deer jerky, but have had problems with some jerky getting done to hard and some not all the way. I use a dehydrator for making jerky. I have since bought a cheaper meat slicer to get exact cuts. What thickness do you recommend when cutting the meat for a dehydrator? How long do you recommend dehydrating?
 |
| Thinner, 1/8th-inch sliced jerky |
Great Question Paul,
You're on the right track by purchasing a meat slicer! That will give you a more consistent thickness on your strips. A jerky slicer is even better because it's already gauged to the proper thickness, so you don't have to turn a knob to set the thickness. When you have different thicknesses, thin strips will be overcooked and thick strips will be undercooked, so you're on the right track. Thickness depends on your own personal preference. I'd say 3/16 - 1/8th of an inch is good for a dehydrator. I wouldn't go any thicker than that in a dehydrator because of the low drying temperature.
Now for the rest of your question. You're also on the correct track: the amount of meat you place in the dehydrator is going to change the length of time you dry for. More meat equals longer drying times. With that being said, I hope you can see that making the same size batches every time is just as important as slicing the strips at the same thickness. It all works together, adding the seasonings to the correct poundage of meat, slicing the same thickness and drying according to the amount of product loaded into the smoker or dehydrator.
I really can't give you an exact drying time because the time will vary according to the amount of meat placed into the dehydrator or smoker. My method for checking my finished jerky product is a two step process. First I squeeze the jerky to be sure I no longer feel that "sponge texture" to the meat, however I still like to be able to flex and bend the jerky strip without it breaking, If it breaks, it's too dry, and if it still feels "spongy," then I have raw spots in the center of the strip. I then log the amount of time I dried the product and now I have a formula for the next batch!
I hope this helps and remember it's all about consistency - in thickness, seasoning, batch size and drying time. Be consistent and you will be making jerky like a pro!
Thanks for the question Paul!
Friday, February 21, 2014
How Do I Make Dry Chipped Venison?
Dave from Elk Ridge, MD asked:
4. This next step is rather fun! I macerate the surface of all the muscles. To do this, I take my knife and create a cube steak looking surface. This will help the product bind and knit together.

Wanting to make dried chipped venison, just like dried chipped beef you would buy in the store. Any idea how I would go about it? Remember the stuff in the store is paper-thin.
Hello Dave!
I have two words for you... Mastering Marination! This DVD that I have produced makes that exact product! I'll do my best to describe it here, but I still highly recommend that DVD as it will be much easier to follow.
I have two words for you... Mastering Marination! This DVD that I have produced makes that exact product! I'll do my best to describe it here, but I still highly recommend that DVD as it will be much easier to follow.
The method I use follows:
1. Inject and brine your venison ham with the bone in. I use Hi Mountain's BuckBoard Bacon brine, and cut it with some brown sugar to sweeten it up a bit. I have a specific pattern that I use to inject that covers each primary muscle inch by inch, top round, then bottom round and onto the sirloin tip.
2. After injecting, I then create a 50/50 brine using the remaining brine and water, I cover the product and soak for 5-6 days.
3. My next step is to pull the bone and seam the product into the individual muscles.
5. I then take a 50/50 blend of salt and sugar and gently sprinkle the surface of the meat, like seasoning a steak.
6. Next, rub the surface of the meat vigorously with the palm of your hand until you see the white protein beginning to rise to the surface. The surface will begin to get a paste feeling to it - this protein will bind the product when smoking.
7. Place the sections of meat back together and press into a cotton ham sock. I pack it as tightly as I can, pressing out as many air pockets as possible. Then I take cotton butcher twine and tie strings around it like I'm preparing a rump roast. This process will really hold the product together tightly.
8. Now you're ready to smoke. I usually smoke for 2 hours and then begin increasing the house temperature until I reach an internal temperature of 156F, which is fully cooked.
9. Cool the product, remove the netting, and chip very thin using a Weston Electric Meat Slicer.
This is not an easy product to make, so I would highly recommend getting the Mastering Marination DVD before taking a stab at it. The DVD does a great job showing this step by step process. Don't mess up an entire hind quarter trying it. Spend the few bucks and get the DVD - you'll be happy you did.
Good luck and thanks for the great question!
Brad Lockwood, Love of the Hunt TV host
Wednesday, February 19, 2014
How Do I Make My Own Venison Burgers?
Sonny from Baker, FL wrote:
I usually take my deer meat to get it processed, but this year I wanted to do it myself to save money. What steps do I take to just make deer burger. I usually get it 60/40.
Sonny,
Processing your own game can be fun, easy and very rewarding! To do it right, it does take a little knowledge. I would recommend our Deer and Big Game Processing Volume 1 DVD. This video will take you step by step from field dressing meat animals & trophy animals, to skinning meat animals and preparing the cape on trophy animals, aging your game animals, quartering them, de-boning each and every quarter and then defining what every primary muscle is best used for! It also covers basic grinding and packaging. This video is must have for every hunter, beginner to advanced.
To answer and explain some basic grinding questions, here is a start for you! For one thing, you'll need a Meat Grinder. I only use Weston Meat Grinders - you can rely on them to get the job done and they have a whole range of different price points and sizes. They also already come with the plate that you need for making burgers. You'll just weigh everything, cube up your deer meat, cube up the fat, and then run them through your grinder. That's all you'll need to do to get ground deer meat for burgers.
As for ratio, I really have to recommend an 80/20 blend of fat to lean ratio, or you can go slightly leaner to a 85% lean and 15% fat ratio. This is going to give you a good frying burger that will be nice and juicy and hold together on the grill.
Now, if you go to a mix of ground beef mixed with venison meat you can go to a higher ratio, however you may start to lose the fact that it's actual wild game meat. My favorite blend is 8lbs of game meat and 2lbs of 50/50 blend beef. This is just a fatty beef mix generally taken from beef ribs. It adds a lot of good fat for flavor, but also adds good lean beef as well.
Oftentimes, when you mix straight fat, you can end up with too much fat. So when I mix straight fat, I always blend 9 lbs of good lean game meat to every one pound of straight fat. Dice the fat small so when you grind it, it will blend in well.
Good luck and be sure to take a look at the DVD. It will really be a big help. Thanks for the question!
Brad Lockwood
Friday, February 7, 2014
Where to get Grinder Plates & Knives Resurfaced and Sharpened
Chuck from Benton, AK wrote:
Eventually, grinder plates need to be resurfaced and rotor blades need to be replaced. Who would you recommend to do this?
Hello Chuck,
Thanks for the question! To tell you the truth, Chuck, this has become a thing of the past. Back in the day with our large commercial grinders, we would mail plates and knives in and have them resurfaced. But now, with consumer grinders, it's really difficult. The costs of plates and knives are nowadays so reasonable that you will spend more money on the shipping and in having them ground down, than you would have if you just bought new ones.
Brad Lockwood

Eventually, grinder plates need to be resurfaced and rotor blades need to be replaced. Who would you recommend to do this?
Hello Chuck,
Thanks for the question! To tell you the truth, Chuck, this has become a thing of the past. Back in the day with our large commercial grinders, we would mail plates and knives in and have them resurfaced. But now, with consumer grinders, it's really difficult. The costs of plates and knives are nowadays so reasonable that you will spend more money on the shipping and in having them ground down, than you would have if you just bought new ones.
The second issue is: When consumer grinders are made, the tolerances on the grinders are so close that if you grind any surface off the grinder plate, the collar that tightens the head will no longer press the plate back against the blade tight enough to grind properly. Sure, if you put a small lock washer behind the grinder knife, you can shim it out a little and still get the collar tight - and it will work - but it's not how the machine is designed to operate.
Here's a little trick I always use: When I receive my new plates, I always purchase 2 new blades for every new plate. I take a dremel tool and engrave a 1 on one side of my plate. Once I notice my grinder not grinding properly, I then turn the plate over to the fresh new side and change the blade. Now I basically have a brand new set of tools ready to go. If you don't label the sides of your grinder plate it gets flipped to one side, then the other and then back and forth and so you can't remember which side has been used the most. Then frustration sets in. Label the sides of your plate and use that side with the same knife until the plate is worn down on that side and then flip the plate over and change the blade.
Here's a little trick I always use: When I receive my new plates, I always purchase 2 new blades for every new plate. I take a dremel tool and engrave a 1 on one side of my plate. Once I notice my grinder not grinding properly, I then turn the plate over to the fresh new side and change the blade. Now I basically have a brand new set of tools ready to go. If you don't label the sides of your grinder plate it gets flipped to one side, then the other and then back and forth and so you can't remember which side has been used the most. Then frustration sets in. Label the sides of your plate and use that side with the same knife until the plate is worn down on that side and then flip the plate over and change the blade.
I get all of my meat grinder plates and knives here: The Hunter's Butcher Shop
Thanks for the question Chuck,
Thanks for the question Chuck,
Brad Lockwood
Wednesday, February 5, 2014
Making Sausage from Frozen Ground Meat, Then Freezing Again
Nicholas from East Dover wrote:
Congrats on the Moose! My favorite!
Brad Lockwood
I harvested a moose Oct 2013. I ground a lot of burger and vac packed it and froze it. Can I thaw it out make it into sausage and refreeze it?
Nicholas,
We had a couple questions very similar to this over the last couple weeks. I will cover some additional topics in this blog and then encourage you to look at the other questions regarding this subject.
Nicholas,
We had a couple questions very similar to this over the last couple weeks. I will cover some additional topics in this blog and then encourage you to look at the other questions regarding this subject.
A large part of making quality products is processing them the way you typically expect them to be. In other words, if you are making hamburger, you expect it to be ground twice so it has the texture of hamburger. If you are making sausage, you expect it to be once ground so it has the course texture you expect for sausage. With that being said, if you have hamburger in the freezer, it's already twice-ground, so trying to make it into sausage, which is only once ground, is going to be very difficult. Don't get me wrong: You can do it, but the texture you have come to expect from sausage won't be correct.
If you are asking about freezing and then refreezing you have no issues there, as I have stated in several other blog questions: Freezing and refreezing is not an issue. Your issue here is a texture issue. As the liquid inside of the moose's muscle fiber freezes, it expands, which creates a mushy texture.
Seasoning can also be an issue. I prefer to grind my seasonings into the meat. Since your meat is already ground, you don't want to grind it a second or third time to get seasonings into it. Instead, you'll have to use a Meat Mixer or work very hard with your hands to get the seasonings mixed into the meat as well as they need to be.
Another topic of discussion covered in my Advanced Sausage DVD is protein extraction. When you put salts and sugars into meat and then mix like crazy to get the seasoning blended, you extract proteins from the meat that act as binders. These binders will make your product tough and chewy with a rubber-like texture, which is very undesirable in a sausage product.
You should also check out this other post I've written on the topic:
Here is some advice on specific products you can make from your pre-ground moose meat:
- Summer sausage is a large diameter product placed into a larger casing. For that reason, it takes additional binding to keep it from getting soft during smoking so mixing your seasonings in, grinding it a third time and then stuffing and smoking can make a good product.
- Moose Hot Dogs are another great sausage-type product you can make. Here's a video on how to make them: How to Make Wild Game Hot Dogs
- Another great product you can make, which is one of my favorites, is ground jerky.
Congrats on the Moose! My favorite!
Brad Lockwood
Monday, February 3, 2014
Wild Game Brines
Gary from Oakfield, WI wrote:
Thanks for the great question AND the new topic! This is a new category that I haven't received questions on until now!
I have always smoked my venison roasts myself, and I am looking for a new brine to use in the preparation process. Would you be willing to part with a recipe, or send me looking in a certain direction?
Hello Gary!
Hello Gary!
Thanks for the great question AND the new topic! This is a new category that I haven't received questions on until now!
Cured venison hams are a very fun product to make, and I usually brine mine, then use a Weston Meat Slicer to slice it thin like chipped corned beef for sandwiches. There are several good brines that you can use. Hi Mountain has a Brown Sugar Canadian brine mix that is very good. They also have a BuckBoard Bacon Brine that, when mixed with some additional brown or white sugar, works very well for injecting and soaking roasts to smoke as well.
The one important secret that I will share with you is to keep in mind these are simply a base recipe for salt/sugar brines. They contain the cure that you will need to preserve your product, BUT they are only a BASE recipe for you to start with. Feel free to add additional salt if you want a salty product, additional brown or white sugar for a sweeter product or increase both salt and sugar content for an overall stronger flavor profile!
I always inject my hams with all the brine they will hold! Fact is: with a simple injection process, you will only get a 12-15% brine pick up anyway, so you really can't over inject. The muscle tissues can only hold so much marinade and the rest will just run out. I then take my remaining brine and cut it with 50% water, soak for 3-5 days covered in the cooler, remove it, rinse well and then smoke.
I produced a great DVD that showcases these brining techniques entitled Mastering Marination. Be sure and check it out - you will enjoy the information shared in that DVD. It covers ducks, geese, boneless smoked venison hams, smoked fish and much more!
Thanks for the great question and the new topic of discussion!
Brad Lockwood

Thanks for the great question and the new topic of discussion!
Brad Lockwood
Wednesday, January 29, 2014
How to Use a Bradley Smoker
Dan Trout from Spencer, WI wrote in:
Brad,
Dan,
I know you're going to love that smoker with the self feeding smoke bricks! I would recommend contacting Bradley to order your next box of wood bricks and ask for a recipe book - they have them there. Or simply continue to check out the videos on this blog that put the Bradley Smoker to work. Here are a few to start out with:
Brad,
I just bought a Bradley Smoker secondhand and couldn't find a recipe & instruction book. Could you help please?
Dan,
I know you're going to love that smoker with the self feeding smoke bricks! I would recommend contacting Bradley to order your next box of wood bricks and ask for a recipe book - they have them there. Or simply continue to check out the videos on this blog that put the Bradley Smoker to work. Here are a few to start out with:
I use the smoker at the end of course, so you'll be able to pick up some tips when you get to the end of the videos.
Smoking meats is all about basic principles. You can learn about natural smoke application, water activity, relative humidity, and surface moisture from our Sausage and Jerky Processing DVDs. Once you have the basic smoking principles down you can develop your own products & recipes and be smoking like a pro in no time!
Brad Lockwood
Brad Lockwood
Wednesday, January 15, 2014
Making Sausage & Smoked Products from Frozen Meat
Tom from Pekin, IL asked:
Can you make sausage and smoked meat from frozen meat?
Tom,
Can you make sausage and smoked meat from frozen meat?
Tom,
For sausage, so long as the meat is not already ground, then yes, you sure can! You can simply watch any of our online Sausage How-To Videos and make a great product. You'll simply drop your frozen, cubed meat into the grinder just as you would unfrozen and go from there!
If it has already been ground, then you're limited to the products that you can make. You'll have a texture issue with sausage, so no, I do not recommend making sausage from frozen ground meat. Most ground products where the texture matters - I would not use frozen ground meat.
Finally, if you're talking about the age-old myth that you can't freeze and thaw meat, then make anything from it - that's just an old wives' tale. Most of the meat products we receive in the commercial processing industry have already been frozen before we ever receive them. Like I said before, there's some damage caused by freezing, but if you're not cooking a filet mignon, it won't make enough difference to truly affect quality so long as you're thawing it first. The way you prepare and cook it will be much more important.
One smoked product that I like to make from already ground and frozen hamburger is ground jerky. You can simply add your seasonings, grind it one or two more times to get it to a nice fine texture, and get your seasonings mixed well. Then, you push it out through the Weston Jerky Gun and load it into your smoker. That's one of my favorites - Here's the post and video about how to do it: Hamburger Jerky.
As for making smoked meat from frozen meat...
The issue with freezing any meat is that it damages cells. When you freeze meat, the moisture inside turns into ice crystals, which puncture the muscle cells. When the meat thaws, all of the fluid - holding those good salts and proteins - floods out of the holes that were made. The result is more loss of moisture when you cook the meat than you would have lost starting from raw meat. That said, this isn't really a problem in sausage making because you're going to grind the meat anyway.
It comes into play more with roasts and steaks. If you're talking about smoking a chunk of frozen meat, then no, it's not the best way to do things. It's not unsafe, and it will get the job done. However: the point of thawing is even cooking. If the meat is frozen, it will take longer for the internal temperature to rise - so the outside of your meat will be overcooked by the time the inside of it gets to where it needs to be for safe eating. The moisture will also have left so quickly that you'll be left with a tougher product. Obviously, it's frozen, so it's going to take quite a while to cook. At that point, you'll probably have been better off just taking the time to thaw it. But my advice is this: If you're going to smoke frozen meat, use a thermometer to check the internal temperature, and go low and slow. You can do it, it's just going to bring the quality down.
Finally, if you're talking about the age-old myth that you can't freeze and thaw meat, then make anything from it - that's just an old wives' tale. Most of the meat products we receive in the commercial processing industry have already been frozen before we ever receive them. Like I said before, there's some damage caused by freezing, but if you're not cooking a filet mignon, it won't make enough difference to truly affect quality so long as you're thawing it first. The way you prepare and cook it will be much more important.
Good luck and let us know how it turns out!
Brad Lockwood
Monday, January 13, 2014
Non-Fat Milk in Sausage Making
Tim from Bullhead City, AZ asked:
Is the non-fat milk the stuff you buy in stores for sausage making?
Is the non-fat milk the stuff you buy in stores for sausage making?
Thanks for the question Tim,
Yes, the non-fat dry milk that you buy in the grocery stores can be
used as a binder when making smoked sausage products. I use this product a lot
when making summer sausage. A typical mixture would be 1 lb for
every 50 lbs of meat. It's a great binder with very little flavor effect on
the product, and it really helps hold moisture in.
When making smoked
sausage products, you can always figure that the smoker will pull about 12-15%
moisture out of your product, so I always add an additional 10-12% water, then my non-fat dry milk, and then I mix it all very well until all the water has been
absorbed.
Often times, it's a good idea to place the product back into the cooler
for an hour or so to let the meat set up a little before stuffing. If
you stuff right away, the product will be very wet and difficult to work with.
Good luck Tim and please let us know how the product turns
out!
Brad Lockwood
Thursday, January 2, 2014
Meat Smoker Recommendations
Kenny from Shenandoah, VA wrote:
I would like your recommendation on a durable smoker that is dependable, rugged and not terribly expensive. It should be easy to use, hold a consistent temperature and have large capacity, as I would like to smoke whole hog hams and sides. I have looked at many brands and spoke to some friends but I just can't make up my mind. Any assistance would be appreciated.
Kenny thanks for the question,
I apologize for being late on my reply, hunts and the holidays have me running behind. Sorry about that!
I don't know how much this helps, but hopefully it will give you some ideas to consider when making your selection.
I would like your recommendation on a durable smoker that is dependable, rugged and not terribly expensive. It should be easy to use, hold a consistent temperature and have large capacity, as I would like to smoke whole hog hams and sides. I have looked at many brands and spoke to some friends but I just can't make up my mind. Any assistance would be appreciated.
Kenny thanks for the question,
I apologize for being late on my reply, hunts and the holidays have me running behind. Sorry about that!
There are several things to consider when looking at a new smoker:
- Gas heats faster than electric, but electric has much less maintenance and is a lot more convenient.
- Will you be smoking in an area where electric is conveniently located, or would a propane tank be easier to use at that particular location?
- How well is the cabinet insulated? The heavier the steel and thicker the walls are, the less heat you'll lose when smoking during cold temperatures.
- The most important topic for me is the method that the house uses to create smoke. I like the smoke generator on the Bradley Smoker. Because it has a separate heating element, this smoke generator allows me to smoke products like cheese (which would ordinarily melt) and cold smoked sausage. It also allows me to smoke a lot longer at lower temperatures. The issue with many of the smokers on the market is that the heat source that creates the heat inside the cabinet is the same heat source that creates the smoke. So with that being said you have to turn up the cabinet temperature to have smoke, so you can't properly smoke salmon and other cold smoke products so you can't have smoke inside the cabinet without a lot of heat.
- Another great feature of the Bradley smoke generator is the way the wood pucks only remain on the heating element for a selected period of time. They are then pushed off into a pan of water and drowned out. This keeps from burning the same old wood chips over and over again, which causes that bitter, sharp smoke flavor that you don't want in your products. When you can burn fresh wood chips you'll get a smoother and cleaner smoke. Having a smoker with a separate smoke generator is a very convenient feature to have.
- If you're not worried about cold smoking products or smoking cheese, and you'd prefer a propane-fueled smoker, I'd recommend a Weston. They're all made of thick steel, some of them have stainless steel doors, their fuel delivery systems are solid, and they come with sausage hooks, which are mighty handy. They have different sizes, the largest being the 48", which will surely fit your hams. The thing to remember about the propane-fueled smokers is that the larger they get, the harder they are to heat and maintain. A 48" smoker is quite a beast, so you have to make sure you preheat it and monitor the temperature every so often. Anything that large is going to take some care to heat. If you look at the 36 inch and think that will fit what you're trying to smoke, then I'd go with that one since it's easier to keep hot.
I don't know how much this helps, but hopefully it will give you some ideas to consider when making your selection.
Subscribe to:
Posts (Atom)